
Replacing your peeling headphone pads or band cushions is much easier than you think especially when you know that there are several methods out there to implement, so according to my research for this issue, I have prepared all of the most commonly tested solutions over the internet and combined them all in one in the below tutorial.
To replace your peeling headphone pads or band cushions this depends on the type of your headphone, but as a generic answer either you need to cover your current peeled one by stitching a fabric cover on it (as described below) or purchase new pieces online and replace them easily as described in the below steps.
Table of Contents
- Why My Headphone Pads And Band Cushions Are Peeling?
- How to Replace Peeling Pads and Band Cushions?
- DIY: Headphone Peeling Band Replacement
- DIY: Headphone Peeling Cushions (Pads) Replacement
- What Signs My Headphone Cushions Predict They Worn Out Soon?
- How can I prevent the leather from my over-ear-headphones from peeling?
- Conclusion
Why My Headphone Pads And Band Cushions Are Peeling?
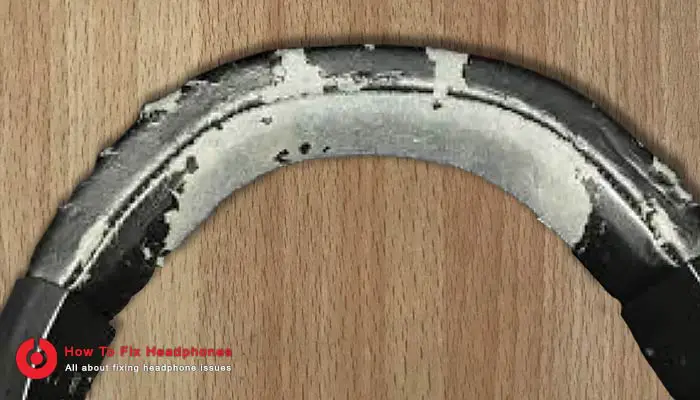
This is a common problem across most headphones, as most headphones cushions (either the band or the pads cushions) are made of fake leather polish manufacturers apply to make it looks like natural leather, in other words, this is what we call Synthetic Leather.
Those Synthetic Leather materials have a lifespan whether you use the headphones (this will shorten the Synthetic Leather lifetime) or you don’t use them at all.
How to Replace Peeling Pads and Band Cushions?
There are several methods you can try at home to replace peeling bands and pads cushions as you will see below but to think in a logical way you should always consider checking the below points before thinking to replace them yourself at home:
- Check your Headphone Warranty: Always check your headphone receipts for warranty as a first action, maybe still you have a warranty, and replacements are included.
- Order Replacement Piece Online: As an alternative way in case of not have a valid warranty you could order the same band or pad cushions online and replace them with new fresh pieces of cushions.
So if you are planning to give the DIY methods a go, then better to look below for all options you could do it at home for both Headphone Band Cushions & Headphone Pads separately.
DIY: Headphone Peeling Band Replacement
METHOD 1 – PEEL OFF THE COATING COMPLETELY
In this method, you can simply peel the coating completely by your fingers or nails till the back layer or cushion cloth which normally looks light grey color. Peeling it all won’t affect the comfort level of the headset.
METHOD 2 – DIY REPLACING PEELING HEADPHONE BAND CUSHION
Here we could do some homemade headphone band cushion replacement using a piece of cloth or any sort of synthetic Leather you might have or even a piece of fabric.
DIY 1 – USE A PIECE OF FABRIC (KEEP THE EXISTING OLD BAND CUSHION):
Check the video below done by this lovely young lady called Reshma for how to replace a DIY homemade headphone band cushion and read the below points for further clarification.
You may check Reshma’s website she is helping people to achieve a better healthy lifestyle.
So let’s start with what we need:
- A piece of fabric that you have at home.
- A needle and thread.
- Pins.
- A measuring tape or ruler.
- A Scissors.
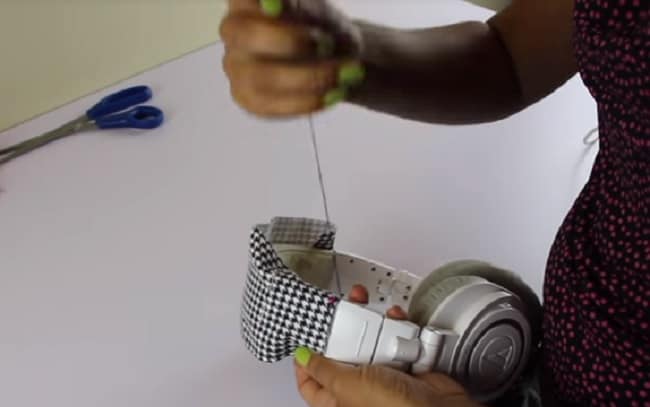
Let’s kick off how to replace my peeling headphone pads:
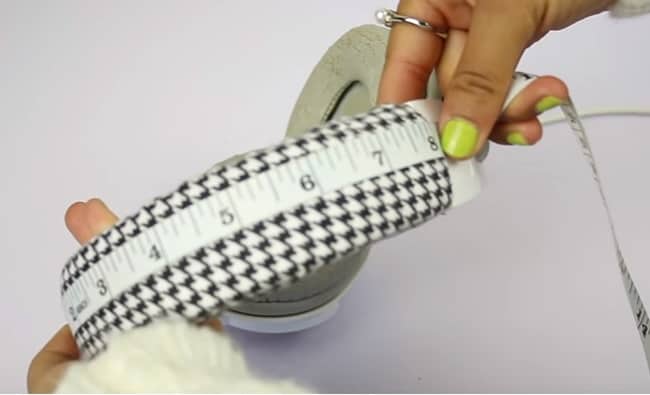
- The first step you should do is to take the measurement of the band length and width that you need to cover (replace).
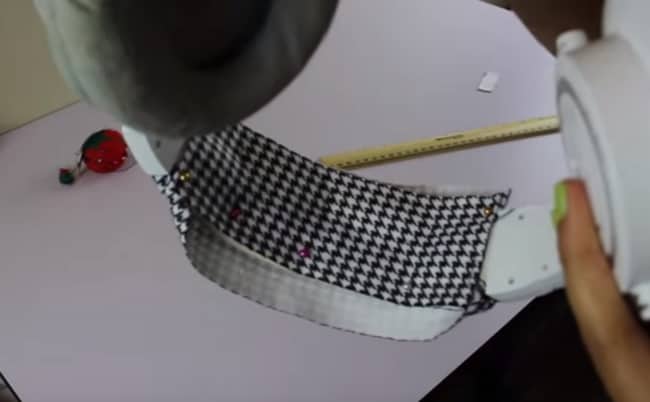
- Cut and prepare the fabric as per the measurement you made earlier and try to put it on top of your band just to double-check everything is fine in terms of fabric piece size.
- Fold the two edges from both ends of the fabric near each end of the band and pin it with a pin. (check the below image).
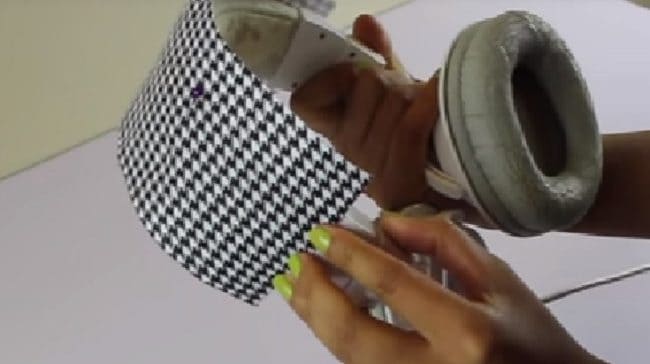
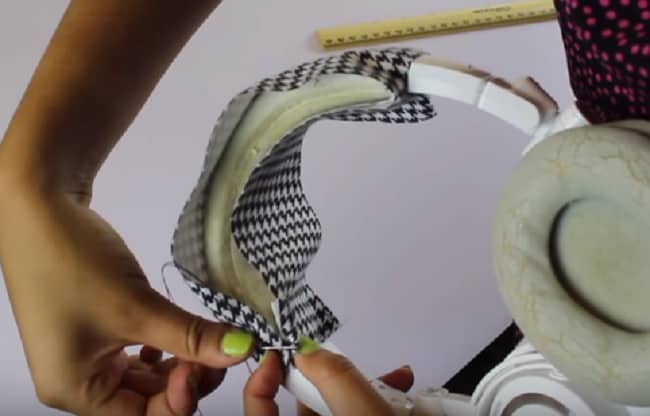
- Now start stitching the fabric on the old peeled cushion using the needle and a thread.
- Add an additional piece of fabric on the bottom side of the band cushion to cover the peeled section of it and also to completely make it look cool. Start stitching this additional piece on the old cushion using the same needle and thread.
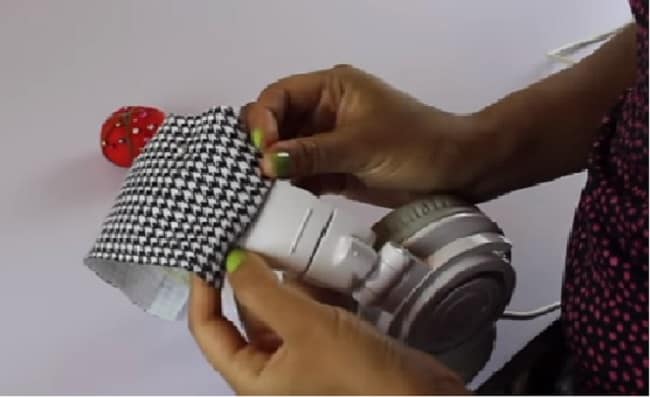
- Now bend all fabric edges and stitch them all together using the needle and the thread, try to catch it to the old cushion while stitching so the final cover will be solidly fixed on the band.
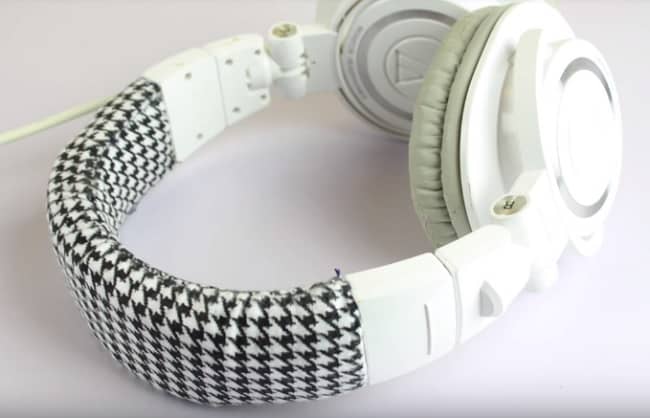
- That’s it, the new headphone band will look like this (in the below image).
DIY2 – USE A THICK PIECE OF SOCK OR CLOTH (REPLACE THE OLD BAND CUSHION):
- Cut a piece of thick foam (or sponge) that fits the specified area on the metal band.
- Insert this foam piece inside the thick sock piece.
- Stitch the thick socks with the foam inside of them to take the final shape and size.
- Now you can fix this new DIY cushion onto the metal band either by tight-ups or by creating another one same size and place it on the top of the metal band and stitch both pieces together while the metal band is between them.
DIY3 – USE A LEATHER OR SYNTHETIC LEATHER (REPLACE THE OLD BAND CUSHION):
- Cut a piece of leather that fits your headphone band or measure it based on the old one length (for the width part you should make it more than twice the width of the headband).
- Cut two pieces of thick foam (or sponge) and stick them on top and bottom of the headphone band using fixing tape.
- Cover the whole area with the leather and stitch it together, make sure the stitching line is facing the inside of the headband (bottom side) using a strong thread like nylon or other alternatives.
DIY4 – REPLACING THE BAND WITH A NEW ONE:
This fix is the best fix in terms of final quality and simplicity. If you are experiencing a damaged headphone band cushion and do not have the skills to do a DIY fix you can simply order a new cushion online within a couple of days you receive the brand new band cushion. The new cushion needs to be very good in quality and reproduces the original band’s comfort.

If you already ordered and received the new band cushion follow the below steps:
- Remove old cushion: by tugging on it gently and in most cases, this is all that you need to do.
- Fix the new band cushion: by inserting its edges into place until it’s firmly and securely in place. Remember in case it requires screws then you may need to screw them back in place.
DIY: Headphone Peeling Cushions (Pads) Replacement
There are a couple of ways to do that in most cases that can be done at home speedily using materials almost anyone could available at home or even without any sort of materials needed:
METHOD 1 – PEEL OFF THE COATING COMPLETELY
In this method, you can simply peel the coating completely with your fingers or nails till the back layer or cushion cloth which normally looks light grey in color. Peeling it all won’t affect the comfort level of the headset.
METHOD 2 – QUICK FIX
A very quick fix for flaking (Peeling) headphone pads can easily be made at home especially when you are not looking to have a fancy-looking solution however, it still can serve you the best with no loss in sound quality whatsoever.
To fix it in this method you need to prepare the below materials:
- 2 rubber bands
- 1 pair of tights (socks)
- A scissors
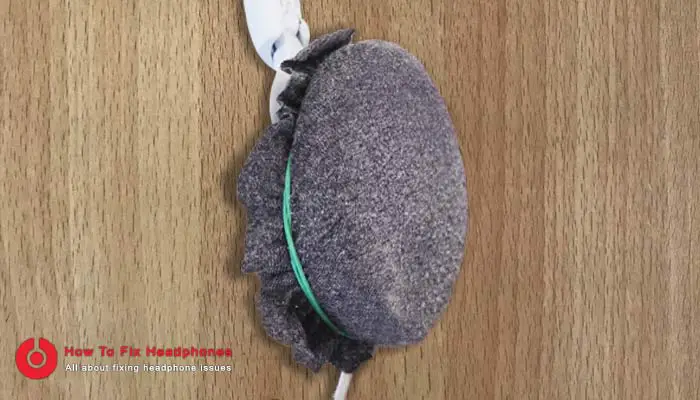
Begin the quick fix:
- Bring the clean pair of tights you do not need to use anymore and cut two pieces out of them using your scissors, each piece should look twice bigger than the pad size in a circular shape.
- Place one circle of tights you just made and cover over each headphone pad separately.
- Slip the rubber band doubled or tripled as needed around the covered pad to hold it in place, try tightening up the cover by pulling the edges of this circle until it’s taut over the headphone pad.
- Trim off any long bits of stocking that are sticking out beyond the elastic.
METHOD 3 – REPLACING THE PADS WITH NEW ONES
This fix is the best fix in terms of final quality and eases to do. If you are experiencing damaged headphone cushions (pads) and do not have the skills to do a DIY fix you can find your needed new pair which is perfectly suitable for your headphone brand. The new cushions need to be very good in quality that replaces the original comfort.
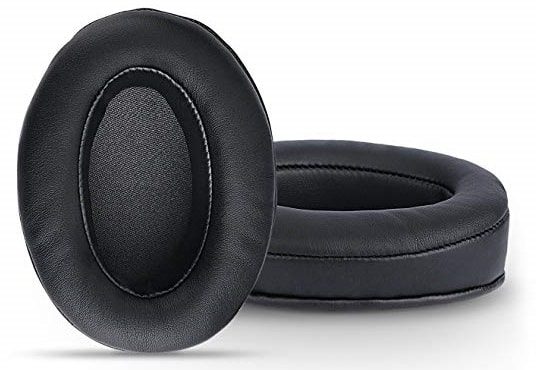
If you already ordered and received the new pad cushions follow the below steps:
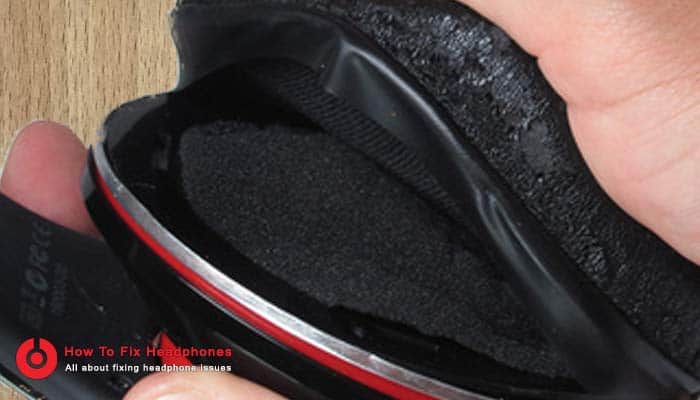
- Remove old cushion: by tugging on it gently and in most cases, this is all that you need to do.
- Stretch the edges of your new cushion over the headphones: until they are firmly and securely in place but remember in case they require screws then you may need to screw them back in place.
What Signs My Headphone Cushions Predict They Worn Out Soon?
There are several signs which you can notice about your headphone cushions over time which predict that soon you might need to replace them, but how soon is required to be replaced depends on how often you use your headphone, so the more often you use them on daily basis will expedite the time you need to replace your headphone cushions otherwise you will not have a comfortable experience listening to music and to your favorite songs.
Having that said, in my research, I found that there are several types of signs that predict headphone cushions worn out soon such as:
- Cracks or Peels: These are very common signs to be shown on your headphone cushions and the reasons behind those cracks and peels are because of our daily usage or because of the weather changing. Normally the leather or even the Synthetic Leather is expanding and shrinking according to the weather temperature, humidity, and dryness and over time the Leather flexibility will be reduced thus creating those peels.
- Sweat and Dirt: Using our headphones eventually builds up the cushions to start smelling moldy or otherwise unpleasant, and this is happening basically because the cushions are absorbing those sweat and dirt.
- Flattened Cushions: This happens usually after a long time of using the headphone as the pressure is applied to each cushion foam when we put it on our ears, this pressure causes the foam structure to break over time, and eventually the foam will be flattened. This will drive your headphones to be not comfortable to use like before.
- Rips: This rarely happens but it could have some parts of the cushion’s outer coating ripped off and needs to be completely sealed in order to keep the inner padding molded to the proper shape and have the right combination of firmness and softness.
How can I prevent the leather from my over-ear-headphones from peeling?
The leather cushions are more sensitive to things like humidity, heat, and light. So you should take care of your headphone leather pads and bands in order to extend their lifespan and prevent having them from peeling off, for this regard, I want to give you hints on how to take care of your headphone cushions and accordingly prevent their leather from peeling over time, so, to prevent headphone leathers from peeling consider:
- Clean Periodically: Wipe and clean your headphone cushions (pads or bands) immediately after finishing using it as this will prevent dirt or sweat to remain on the surface, in order to do that you need to use a damp washcloth that is not soaking wet or for better results you may use a special leather cleaning solution that is designed to clean leather safely.
- Condition Periodically: To prevent leather headphone cushions from cracking, you have to use a special treatment leather condition solution which will not only keep the leather soft but also works as a protection from humidity and isolate it from any environmental conditions. But remember to not over-condition them as this will also lead to premature rotting, so it’s better to condition your leather pads and bands bi-annually (every six months).
- Store Properly: Storing your headphones in a proper manner will hugely impact the lifespan of their cushions, leaving your headphones in humid or hot weather, or even leaving it dry or under sunlight will lead to cracks or peels in their leather. So better to store your headphone in a good protective case to reduce exposure to different environmental conditions.
Conclusion
The longer you wear your headphones, the more you will realize how good or bad they are, hence the cheap or low-quality headphones seem to look good when they are new but after a while, you will notice the difference. For that being said headphone pads or bands cushions are related to the headphone quality, you need to understand as well that no matter what headphone quality you own, at some point you will need to fix or change its cushions, the only difference is the lifespan of your headphone depending on the quality.
Share this article below if you believe people need to know about it … 🙂
Recent Posts
Is Wireless Audio Transmission Not Reliable As Wired Headphones?
Yes, wired headphones are more reliable than wireless audio transmission, as wireless headphones' connection might drop from time to time, as well as it is much more dependent on batteries compared...
As a rule of thumb and the World Health Organization, each person should use headphones at less than 60 percent volume for 60 minutes a day. That’s the safest route you can take for the usage of...
