
Using our headphones on a daily basis has become a habit for many of us, especially for those who use to jog every morning or spend their time on the train listening to music. Who doesn’t enjoy listening to his favorite music in high-quality sound headphones? It’s so common but joyfulness could be ruined easily if your headphones got dirty.
Table of Contents
- Why Should I Clean My Headphones?
- How To Clean My Headset (Headphone & Earbuds)?
- How To Keep My Headphones & Earbuds Clean?
- Conclusion
Why Should I Clean My Headphones?
Headphones and especially earbuds are most exposed to dirt from the date you purchase them and started using them, sweat or ear wax are more common sources of dirt that could be stuck or trapped in your earbuds, which we use to shower after our gym or morning jogging sessions because of dirt and sweat, but what about our headphones? when was the last time we cleaned them?
Headphones become dirty not only because we are using them, but misusing them or saving them inappropriate manner could be worse, we always toss them into our pockets, bags …etc where they keep on being mixed with other dirt, dust, and other grime. And simply we grab them out without any hesitation and use them in our ears.
So cleaning your headphones is crucial to protect them from any sort of sound quality reduction or reducing its lifespan, as well as protecting our own ears from any sort of bacterial infection.
You should clean your headphones regularly for several reasons:
- Preventing headphones from damage.
- Increase Headphones’ lifespan.
- Getting high-quality sound.
- Clear all bacteria that might get into your ears.
So better to check the below easy hacks that actually work on how to clean your headphones and earbuds at home.
How To Clean My Headset (Headphone & Earbuds)?
The easiest way is to wipe your headset (earbuds) tips and pads using a lightly wet cloth with warm water and soap, dry it out immediately after the cleaning process with a dry cloth, you could also use lightly wet Cotton buds or Q-tips to clean small gids or tight areas, the method works well with all types of headphones, earbuds, on-ear headphones, in-ear headsets, Apple Airpods, over-ear headphones.
So to take the above info into a deeper manner when it comes to cleaning your headphones, I will cover the two types of headphones that you might have and require to clean which are:
- Earbuds: Airpods, Earpods, Earbuds, In-ear monitors (IEMs)
- Headphones: In-ear, On-ear, Over-ear Headphones
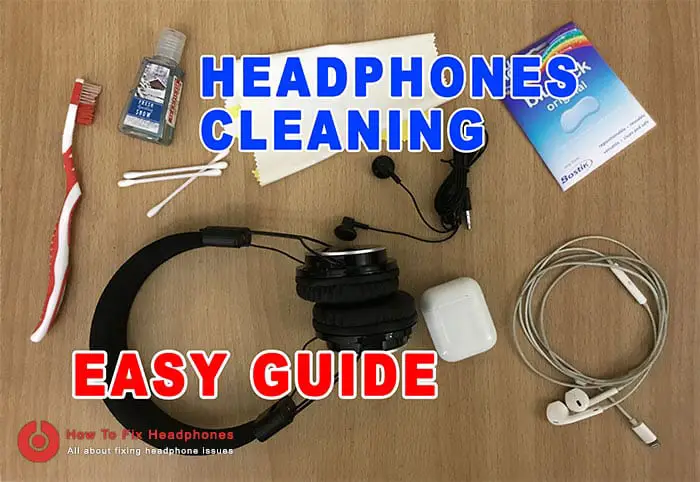
To start cleaning your headphones, you require to have the below:
- Rubbing alcohol or hand sanitizer.
- A small cloth (any cloth even like the glasses soft cloth)
- Cotton buds or Q-tips.
- Soap
- Water
- Blu-tack
Cleaning a headphone has never been easier with the below steps.
How To Clean Apple Airpods
Apple Airpods have their own unique design out of all the earbuds products on the market, they often get dirt and earwax occasionally for both the driver part as well as the charger case.
CLEANING THE DRIVER’S UNIT
This is the unit where the sound is being produced hence we should focus more on the part of it that is inserted into the ears.
Step 1: Using a dry and soft toothbrush (I prefer children’s toothbrush because it is softer), brush the wire mesh gently while holding the mesh facing downwards to help the removed dirt or wax particles fall down.
Step 2: Using blu-tack gel with the aid of a bent paperclip, go over the wire mesh after step 1 and remove all remaining dirt, wax, or dust. Put the blu-tack on the wire mesh and apply pressure to each individual dot of the mesh using the bent paperclip, then remove the blu-tack again.
Step 3: Using a small cloth by dampening it with hand sanitizer or alcohol should finalize the cleaning process by quickly wiping over the metal wire mesh back and forth.
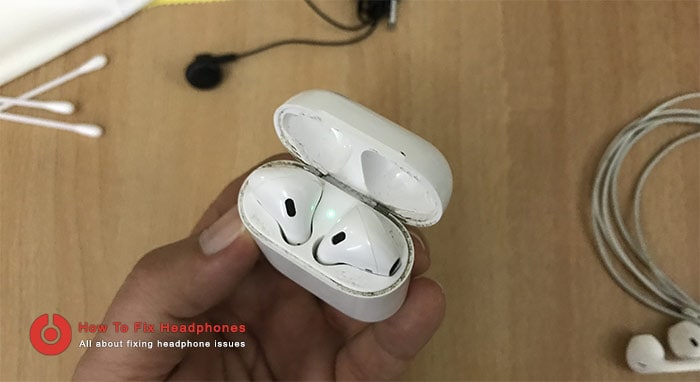
CLEANING THE CHARGER CASE
The Apple Airpods have a charger base to keep them charged and ready to use, and not only they were created to serve drivers charging, but also to support pairing with the iPhone smartphone devices.
Upon using the Airpods, the charging case gets dirty because of the earwax, dust, moist ..etc, however, to clean the Apple Airpods charging case simply follow the below steps:
Step 1: Use a Q-tip or cotton buds after soaking them in alcohol or hand sanitizer and start applying movement with pressure in the case corners where all the dirt is.
Step 2: Use a dry Q-tip or even a dry piece of cloth to wipe and dry the cleaned areas.
How To Clean Apple Earpods
Apple Earpods (the earlier wired version of the Apple Airpods) often get dirt and earwax occasionally for both the driver part as well as the cords.

CLEANING THE DRIVER’S UNIT
This is the unit where the sound is being produced hence we should focus more on the part that is inserted into the ears.
Step 1: Using a dry and soft toothbrush (I prefer children’s toothbrush because it is softer), brush the wire mesh gently while holding the mesh facing downwards to help the removed dirt or wax particles to fall down.
Step 2: Using blu-tack gel with the aid of a bent paperclip, go over the wire mesh after step 1 and remove all remaining dirt, wax, or dust. Put the blu-tack on the wire mesh and apply pressure to each individual dot of the mesh using the bent paperclip, then remove the blu-tack again.
Step 3: Using a small cloth by dampening it with hand sanitizer or alcohol should finalize the cleaning process by quickly wiping over the metal wire mesh back and forth.
CLEANING THE CORDS
The Apple Earpods have two cords connected together at the audio jack, those cords normally get dirty because of normal daily use but still, we can clean them so easily.
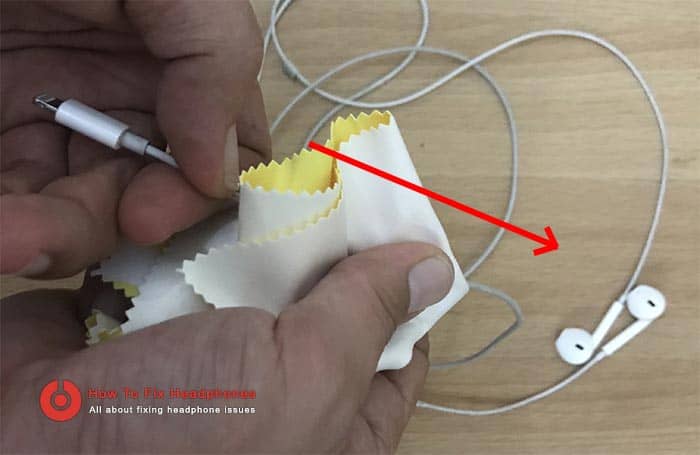
Step 1: To clean the cords simply dampen a piece of cloth with alcohol or hand sanitizer.
Step 2: Hold the cable near the audio jack/lightning jack in your left hand.
Step 3: Using the soaked cloth in your right hand, encircle the cable and wipe firmly with the cloth moving towards the Earpods drivers.
How To Clean Earbuds
This is a very generic procedure cause there are plenty of earbuds types and designs in the market, I will cover different types of them below.
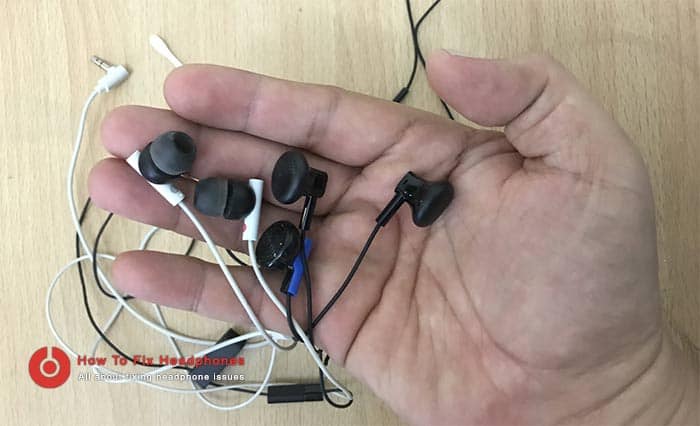
CLEANING THE DRIVER’S UNIT
Before you clean your earbud drivers, if you have earbuds with silicone or foam tips then you should remove them first, as these in-ear headphones like IEMs or even normal ones normally come with detachable silicone/foam ear tips to provide variety in sizes and provide the best fit for our ears.
Step 1: Remove the earbud’s silicone tips.
Step 2: Using a dry and soft toothbrush (I prefer children’s toothbrush because it is softer), brush the wire mesh gently while holding the mesh facing downwards to help remove dirt or wax particles falling down.
Step 3: Using blu-tack gel with the aid of a bent paperclip, go over the wire mesh after step 1 and remove all remaining dirt, wax, or dust. Put the blu-tack on the wire mesh and apply pressure to each individual dot of the mesh using the bent paperclip, then remove the blu-tack again.
The blu-tack will pick up all the extra substances from the mesh and leave it debris free.
Step 4: Using a small cloth by dampening it with hand sanitizer or alcohol should finalize the cleaning process by quickly wiping over the metal wire mesh back and forth.
CLEANING THE EAR TIPS
To clean your earbuds tips you should consider the type of the materials those tips were made from, for example, if you have silicone ear tips, then follow the below steps:
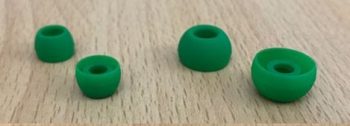
Step 1: Detach the silicone ear tips from your earbuds.
Step 2: Soak them for 5 minutes in slightly soapy warm water.
Step 3: Rinse the silicone tips, give them a good wipe down.
Step 4: Leave them to dry completely on paper towels before reattaching them.
If you have a foam type of ear tips, then better to go for the blu-tack solution to grab all the dirt out of them securely.
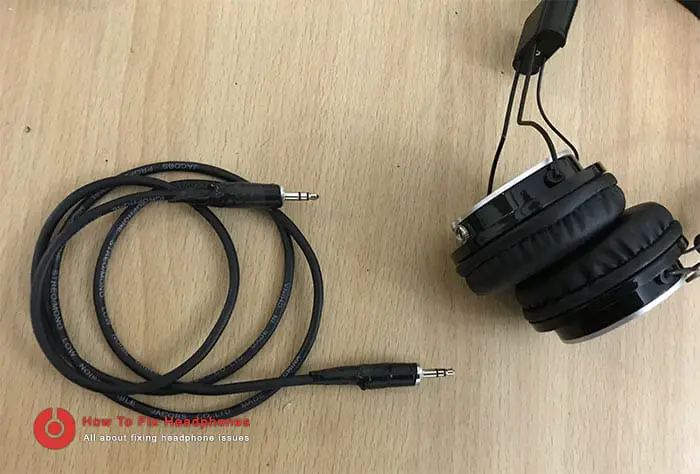
CLEANING THE CORD
The earbuds have two cords connected together at the audio jack, those cords normally get dirty and sweat spots because of the normal daily use but still, we can clean them so easily.
Step 1: To clean the cords simply dampen a piece of cloth with alcohol or hand sanitizer.
Step 2: Hold the cable near the audio jack in your left hand.
Step 3: Using the soaked cloth in your right hand, encircle the cable and wipe firmly with the cloth moving towards the Earbuds drivers.
How To Clean On-Ear Headphones
These types of headphones require periodic cleaning and special treatment for the leather to stay functional for a longer time, they have different parts compared to earbuds style headphones, they consist of caps cushions and band cushions.
To clean your on-ear headphone you need to focus on their two main parts which are the band cushion and the earpads by following the below steps.
CLEANING THE HEADPHONE EXTERIOR BODY
Step 1: Remove the ear pads.
Step 2: Wipe down the exterior body of the headphone with a small cloth dampened with soap and warm water.
Step 3: Wipe dry with some paper towels and leave to completely air dry.
CLEANING THE EAR PADS
Step 1: Dampen a small cloth with rubbing alcohol.
Step 2: Gently wipe down the exterior of the ear pads.
Step 3: Use a Q-tip or cotton bud to clean the nooks and crevices of the ear pads after soaking them in alcohol or hand sanitizer.
Step 4: Dab some alcohol over the foam mesh surface and gently rub both the left and right sides together.
Step 5: Leave both ear pads to air dry completely by putting them on some paper towels before reattaching and using them.
CLEANING THE HEADPHONE BAND
Headphone bands are one of the main parts of any headphones that get dirty easily or start peeling its leather over time, this is caused by daily usage as well as sweat.
To clean your headphone band cushion simply follow the below steps:
Step 1: Wipe down the headphones band and its cushion with a small cloth dampened with soap and warm water.
Step 2: Wipe dry with some paper towels and leave to completely air dry.
Step 3: Dab some alcohol over the cushion surface and gently rub it down.
Step 4: Leave the band cushion to air dry completely by putting them on some paper towels.
How To Keep My Headphones & Earbuds Clean?
It’s so important to keep your headphones and earbuds clean not only for the sake of your ear health but also to have long-lasting headphones for daily usage.
To keep your headphones and earbuds clean and prevent them from getting dirty:
Tip 1 – Cleaning them regularly
Cleaning your headphones regularly is a must to prevent further dirtiness.
Tip 2 – Store them in a protective case after finishing
Have you ever had that funky smell out of your headphones? this is caused by moisture and dirt or sweat stains on the ear pads or band cushion, mostly this is caused by a humid environment if not your sweat, so storing your headphone in a dry storage case is good prevention to keep it clean for a long time.
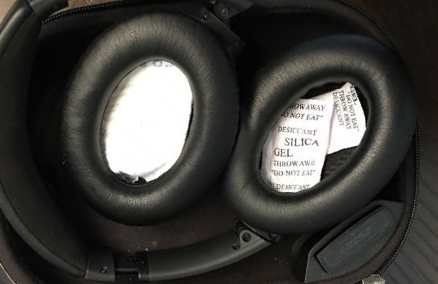
To do so, you need to have a couple of Silica gel packets to be stored in the same headphone case, those gel packets can be found in any electronic device package or food package. Those gel packets will reduce the moisture inside the pack and it is very useful to keep them with your headphones pads while storing.
Tip 3 – Apply leather oil
Applying leather protective oil on the on-ear headphones pads and cushions can rapidly increase their lifespan as well as keep them clean most of the time.
Tip 4 – Do not use your headphones with unclean hands
If you were eating crisps or any oily food by your hands it’s better not to use your headphones till you clean your hands.
Tip 5 – Do not use your headphones while sweating
If you purchased your headphones for the sake of using them indoors and not for jogging, better not to use them if you feel you are sweating, cause this will add dirt to them occasionally.
Tip 6 – Clean Your Ears Regularly
Aside from cleaning and keeping your headphones clean, you should also clean your ears with wax, ear wax is an oil produced by your ear canal to protect it from any foreign particles, thus will add dirt to your earbuds so you should always keep your ear wax-clean.
The above are only preventive suggestions for you to keep your headphones clean hence no one is perfect, and you might need to clean them from time to time as suggested in this tutorial article.
Conclusion
Our headphones will get dirty either by dust, sweat, ear wax… etc no matter how much we try to prevent it, but this is not the end of the world, still, we can clean them regularly using simple solutions at home and keep them ready to use for a long time.
Share this article below if you believe people need to know about it … 🙂
Recent Posts
Is Wireless Audio Transmission Not Reliable As Wired Headphones?
Yes, wired headphones are more reliable than wireless audio transmission, as wireless headphones' connection might drop from time to time, as well as it is much more dependent on batteries compared...
As a rule of thumb and the World Health Organization, each person should use headphones at less than 60 percent volume for 60 minutes a day. That’s the safest route you can take for the usage of...
