
Table of Contents
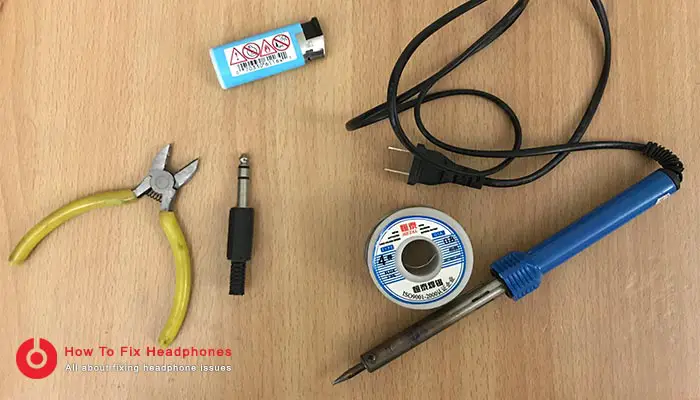
What Tools Do You Need To Replace A Headphone Jack?
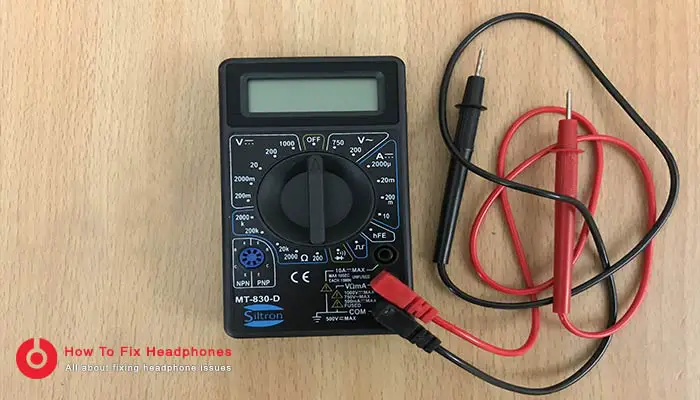
To replace or repair a headphone jack you need the following, so you may check their prices at Amazon:
- New 3.5 mm jack aux jack.
- Wirecutter or Flush Cutter.
- Wire stripper.
- Soldering Iron Tool.
- Lighter.
Since this is the easy way to replace a headphone plug, let’s guide you through the process below.
Before proceeding with the headphone plug replacement
Before proceeding with the replacement of your broken headphone jack, you need to be familiar with the plug parts as this will involve connecting the right parts with the right cables so your headphone works perfectly without issues, also protect your headphone/multimedia device from being defective at any chance.
Headphone Jack Parts
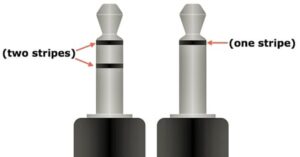
Normally headphones are divided into two categories mono headphones and stereo headphones, commonly most headphones in the market are stereo ones that come with mobile phones, play stations, iPods or any multimedia players cause those are served by average users like yourselves that willing to enjoy listening to high-quality stereo music in your headphones. On the other hand, there are certain cases where mono headphones are being used on certain devices or for studio purposes.
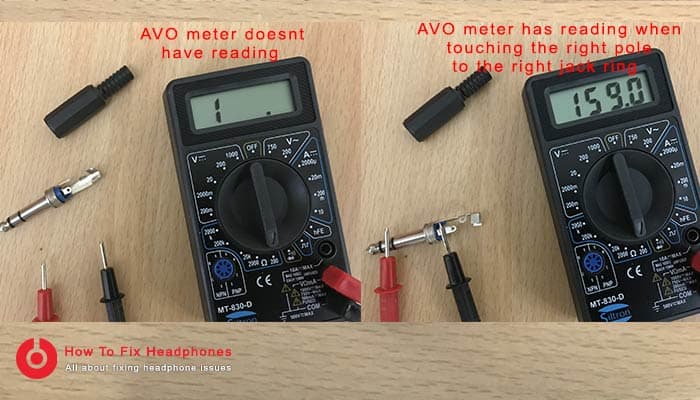
So in this regard, I want you to understand that if you have a normal commonly used stereo headphone you should see that the headphone jack has two black stripes dividing the jack into 3 metal pieces (hence mono headphones will have only 1 black stripe “metal ring”).
Referring to the below image you can see the difference between mono and stereo headphone plugs.
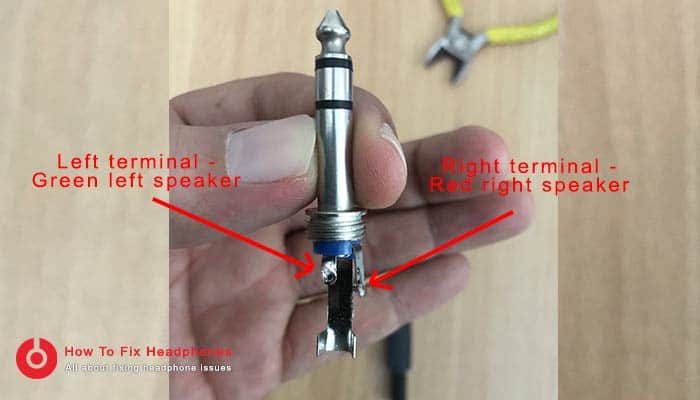
The stereo Headphone plug consists of three parts which are:
- Ground (Always represent the long stripe of the jack)
- Right (always represent the middle stripe of the jack)
- Left (always represents the tip strip of the jack)
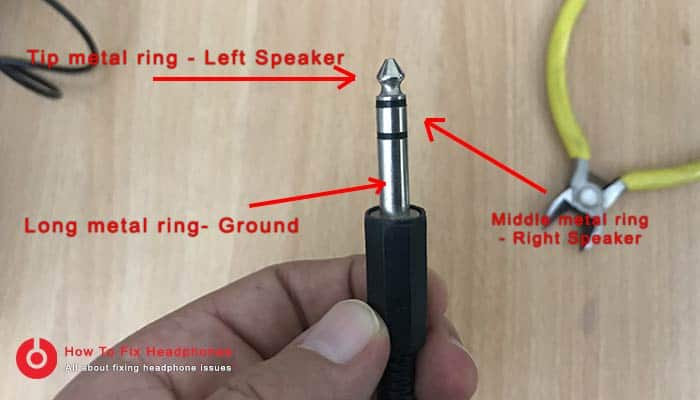
Those parts correspond to 3 cables that are connected to the headphone speaker and this is what we gonna work on to replace the headphone jack after removing the damaged one.
Headphone Jack Repair Steps
Step 1 – Cut the old headphone jack
(this should take around 2 – 5 minutes)
- First, using the wire cutter cut the cable near the plug but leave at least 2 cm cable to the plug cause we will need this next.
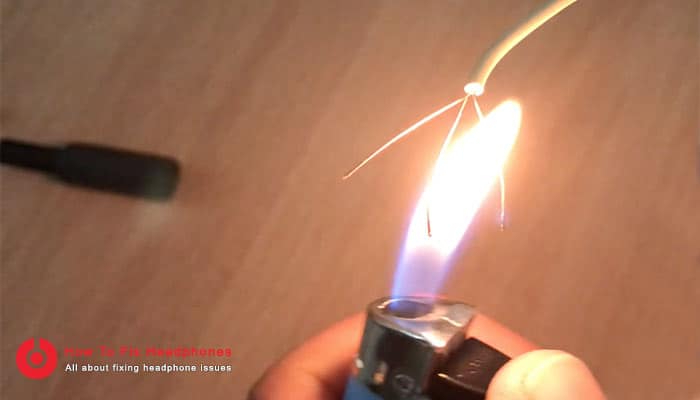
- By using the wire stripper remove around 2 to 3 cm from the headphone cable end.

- Remove the coating from each smaller individual cable Green, Red, and Brown cable using the same mentioned method above or by using a lighter by putting a flame of fire on each cable end for a second to remove the colored plastic shield.
Cables color codes
- The Green cable should connect to the Left speaker.
- Red connects to the Right speaker.
- The Brown cable to the Ground.
Step 2 – Connect the cables to the new plug you have
(This should take no more than 1 – 2 minutes)
- Open the new headphone plug you have by screwing it, then put the second piece of the new plug into the cables you sliced (as shown in the below image) ↓Add – On Note
- The Brown cable should be connected to the big terminal of the new jack plug, simply slide the Brown cable into the big terminal hole as shown in the image and wrap it around the terminal for few times tightly.
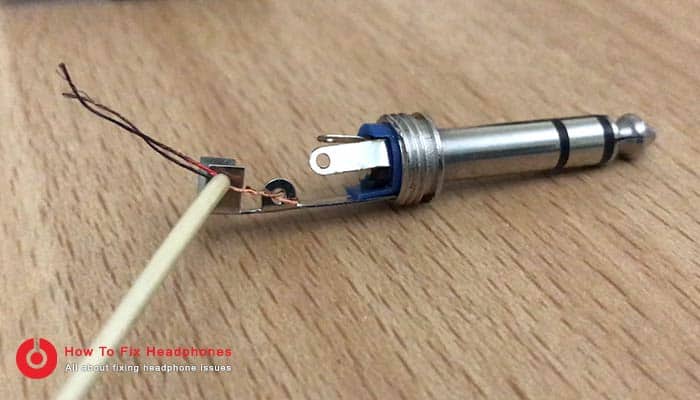
- Solder the twisted Brown cable in its place with the plug terminal and be sure that it is fixed well and solid. (Check the below video and see how I am soldering the brown cable “ground” to the jack pole)
- Insert the Green cable into the left terminal hole (consider it left if you place the new jack body as shown in the below image) and wrap it around the terminal for few times tightly then solder it in its place with the plug terminal and be sure that it is fixed well and solid.
- Repeat the same last step with the Red cable by inserting it into the right panel hole and wrapping it around the terminal for few times tightly then solder it in its place with the new headphone plug terminal and be sure that it has soldered well and solid.

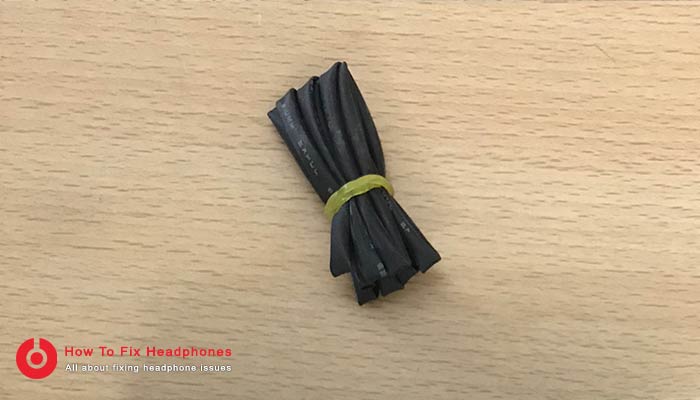
You can do another additional step to make your work perfect by using a Heat Shrink Sleeve by inserting a short piece of it inside each of the three colored cables, and after finalizing the soldering at the last stage simply push those sleeves above all of the three soldered points individually (as shown in the below image) then put some direct heat on them by using a lighter for an example till they shrink tightly on each of the cable/terminal connection.
By using the Heat Shrink Sleeves you are protecting the new headphone plug from being corrupted again in the future and preventing any accidental short circuit that may occur at any time due to daily usage of the headphone.
Conclusion
Often times one earpiece of the earphones stops working or has noise and cuts off the sound, most likely and common reason behind this issue caused by the headphone plug. So replacing the headphone plug yourself at home could be much easier than you expect and since it doesn’t worth wasting your time looking for a technician to make it happen for you, it is better to solve it yourself within minutes in an easy way following How To Replace A Headphone Plug tutorial article.
Share this article below if you believe people need to know about it … 🙂
Recent Posts
Is Wireless Audio Transmission Not Reliable As Wired Headphones?
Yes, wired headphones are more reliable than wireless audio transmission, as wireless headphones' connection might drop from time to time, as well as it is much more dependent on batteries compared...
As a rule of thumb and the World Health Organization, each person should use headphones at less than 60 percent volume for 60 minutes a day. That’s the safest route you can take for the usage of...