
If your headphone band is broken then you just arrived in the right place, I did lots of research for several days over the internet to help you with this solution ideas guide so you can simply fix your broken band the easy way yourself no matter what headphone brand it is by following the DIY instructions below.
Table of Contents
- How To Fix Broken Headphones?
- Best Way To Fix Broken Headphone Bands (Headbands)
- How To Fix Broken (Cracked) Headphone Bands?
- Why My Headphone Is Breaking?
- Types Of Headphone Band Common Issues:
- Types Of Headphone Band Materials
- Related Questions
- Conclusion
How To Fix Broken Headphones?
The easiest method to fix broken headphones is by wrapping the broken parts with scotch tape after applying super glue between the broken portions, also you may use plastic cable ties to hold firmly the two brother parts, if it is a band cushion issue, then you can cut a sponge to fill the band code then wrap it with a cloth or a Synthetic leather if available at home to stitch all parts together.
Best Way To Fix Broken Headphone Bands (Headbands)
There are three types of headphone bands that I will show you how to fix their issues step by step assuming using tested methods that your headphone type or brand is similar to one of these.
Based on my previous experience and after lots of research over the internet there are three main types in general for headphone bands:
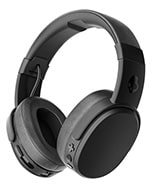
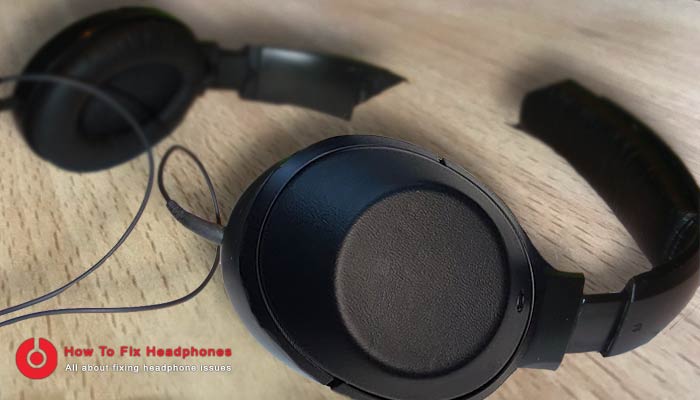
- General or Gaming headphones Style: These types of Headphones have thick headbands made of different materials such as Synthetic Leather, Polyester Fabric Nylon Mesh …etc stuffed with a foam kind of thing inside of it to make it convenient to use on your head as usual, they have a little bit of weight because they are always having a big over-ear style foam earpads that cover most of your ears if not all of your ears for some brands. (Brand examples are: Sennheiser, Audio-Technica, Beyerdynamic, Shure, Bose, Sony, Panasonic, Philips, AKG, Grado …etc).
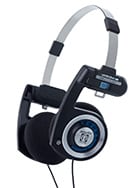
- Slim (Classic) or Walkman Headphones Style: These types of Headphones are thinner, lighter in weight, and smaller in size in terms of their earpads, they are mostly made of metal or plastic bands. (Brand examples are: Koss, Sony, Soundlab, Jlab audio, Vintage Stereo Headphones Chinese made …etc).
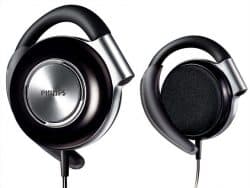
- Clip Headphone Style: Those types are also they call them sports-type in which each speaker is separated by itself and to use it you can clip it (or hand it) on each ear separately. (Brand examples are: Sony, Bose, Scosche, Plantronics, Soundpeats, Photive, Sennheiser, Panasonic .. etc or other Chinese-made.)
How To Fix Broken (Cracked) Headphone Bands?
The first thing to think of when you have a broken headphone band is to order a new one from the manufacturer in case your headphone still under warranty it is the best option to try using this warranty maybe it covers replacing your headphone band, or you may consider ordering only the broken part then replace it for easier and better results.
Otherwise, if you believe your headphone is not that branded expensive you may consider checking the below headphone band fixing methods.
GENERAL GAMING HEADPHONE STYLE – BAND FIXING
There are several methods to fix this type of headphone broken band depending on the headphone band type itself and the common issue related to it:
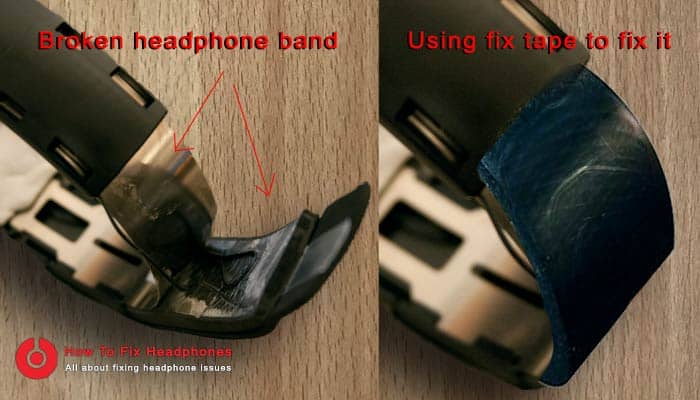
Headphone Snapped Band Fix 1: Using A Fixing Tape
If your headphone broken band cracked in the middle of the band especially if it uses plastic as a band cover then it is very easy to wrap the broken location with a fixing tape tightly and that simply fixes the issue, you could consider the tape color that matches your headphone color in order to make it less visible.
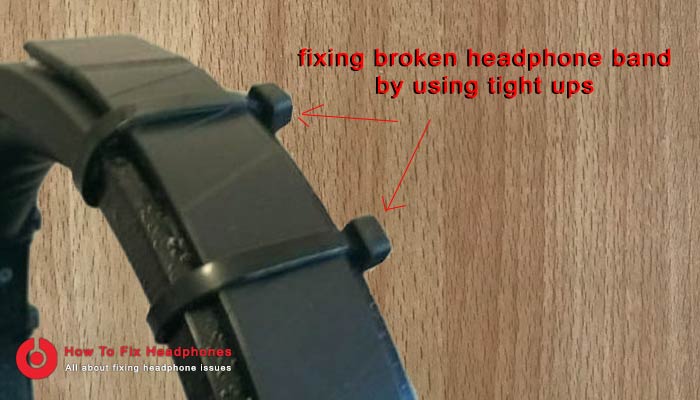
Headphone Snapped Band Fix 2: Using Plastic Cable Ties
To have the more tough and heavy-duty solution you could try using plastic cable ties, by applying the cable ties on the broken or snapped piece, but in this case, you might compromise the feel and look of the fixed headphone band otherwise if you think in a practical way I believe this is a much better solution than the fixing tape one.
Headphone Broken Plastic Band Fix 3: Using Stiff Wire & Super Glue
In case your headphone band is completely broken into two pieces while it is made only from plastic, the best solid solution to go for is by using a Stiff wire and super glue.
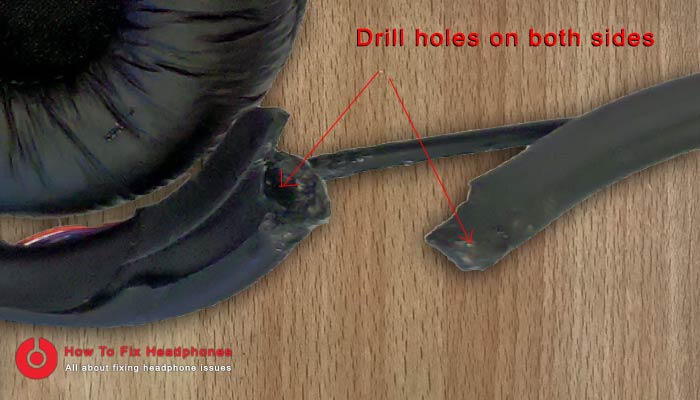
Now for this particular solution, you require to:
- Use a drill machine in order to make two small holes on both broken pieces on the broken ends that fit with the Stiff wire diameter size.
- Then you need to insert the short stiff wire into the holes along with super glue.
- Then either using a fix tape (preferably with the same band color) to wrap it on the fixed section or for more professional practical implementation you could use heat shrink tubes by placing them into one side of the broken plastic then after finishing all fixing work slide the heat shrink tubes on to the fixed section and heat them up with a lighter to fix them permanently.
Headphone Band Fix 4: Fixing Band Cushion Issues
When using the same headphone for several years whether branded or non-branded ones, it is likely to have issues with your headphone band cushions, either the cushion looks old and starts to peel its Synthetic Leather skin off or part of the cushion is snapped out from its place.
The simplest and easiest way to fix this is by ordering a new cushion and replacing it with the old one, now if you are using a cheap headphone that doesn’t worth it then you can check out the steps below either by using a thick piece of sock or cloth or using leather instead-but in all cases the process is pretty similar and makes sure to use a foam or sponge as a stuffing.
Check this video for how to replace a DIY homemade headphone band cushion and read the below points for further clarification.
USING A THICK PIECE OF SOCK, CLOTH, OR FABRIC:
- Cut a piece of thick foam (or sponge) that fits the specified area on the metal band.
- Insert this foam piece inside the thick sock piece.
- Stitch the thick socks with the foam inside of them to take the final shape and size.
- Now you can fix this new DIY cushion onto the metal band either by tight-ups or by creating another one same size and place it on the top of the metal band and stitch both pieces together while the metal band is between them.
USING A LEATHER OR SYNTHETIC LEATHER:
- Cut a piece of leather that fits your headphone band or measure it based on the old one length (for the width part you should make it more than twice the width of the headband).
- Cut two pieces of thick foam (or sponge) and stick them on top and bottom of the headphone band using fixing tape.
- Cover the whole area with the leather and stitch it together, make sure the stitching line is facing the inside of the headband (bottom side) using a strong thread like nylon or other alternatives.
Headphone Band Fix 5: Replacing The Whole Band Metal Body DIY
In case your headphone band body is broken and you don’t want to fix it as described in one of the points above, you still have the option to replace the whole metal body with an alternative DIY solution at home, thus you might need the assistance of an ironworker.
To replace your headphone broken band DIY style you can use sheet metal as an alternative to the original one by following the below:
- Cut around a 1″ (inch) strip after measuring the length needed, to measure it you can use your old band’s length as a reference.
- Bend the sheet metal strip in a curve way to match the original shape and size of the original band.
- Drill some holes at the ends of the metal strip that matches your headphone speaker’s joints then fix them on using screws.
- Arrange the cables and fix them on the metal strip that connects both speakers.
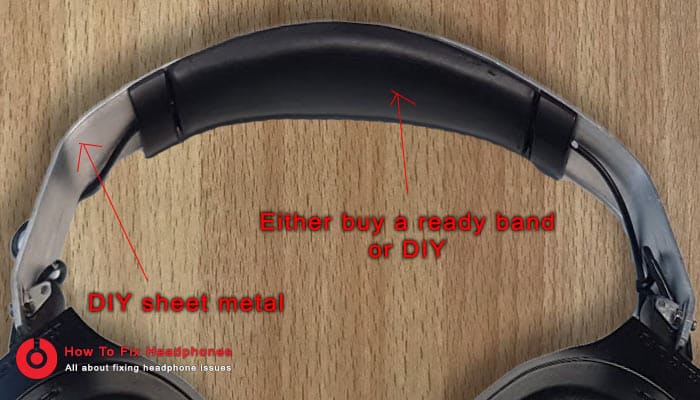
For adding a cushion into this DIY headphone metal band you have two options, either using the old cushion or an old one if available (and stick it with glue, fix tape, or tight ups) or creating a DIY alternative one by following the steps at Headphone Band Fix 4.
Headphone Plastic Band Fix 6: Fixing Cracked Plastic Band
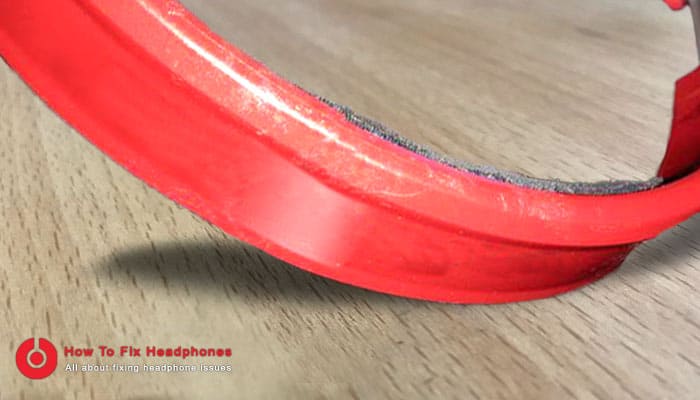
Some headphone brands create a band (outer part) that has a (plastic or metal) slider underneath it to control the size of the headphone overall length to fit over your ears better, so if your headphone has the same band type and it has its plastic outer part band cracked (just like in the below image) then you need to proceed with the best fix below.
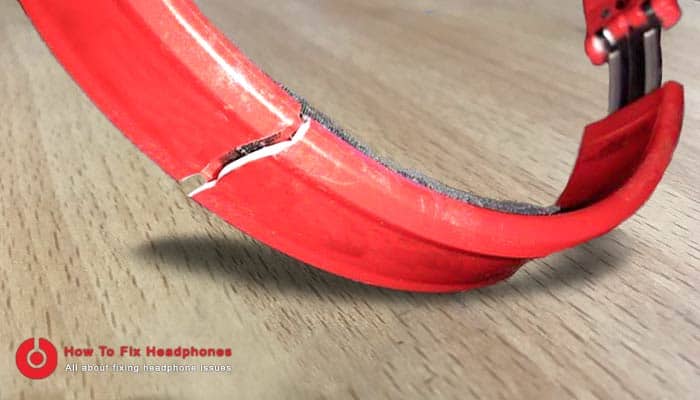
1. Not Nice Looking Easier Solution: You can simply use a fixing tape and wrap it all over the cracked area. Use similar tape colors to be as better as looking as possible.
2. Nice looking better solution: This fix you can use super glue to fix the crack permanently, also you could use a blending plastic transparent piece or colored one (you find it in a paper folder like in the below image and cut a small piece) then stick it over the crack to support and strengthen the fix.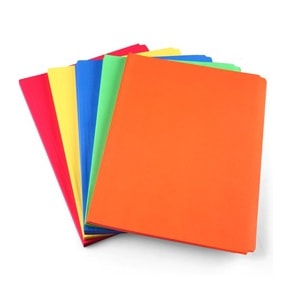
If you can use another plastic piece and fix it underneath the crack (the side that faces the slider) it will be much much better and permanent fix, but in this case, you need to open the pieces apart so you can fix the bendy plastic from both sides along with using super glue on the crack, then fix everything back.
If you find this method a little bit hard to implement you can check an alternative method on how to fix broken plastic bands using Super Glue and Baking Sode below.
Headphone Plastic Band Fix 7: Using Super Glue and Baking Soda
This method is so powerful and easy to do at home with zero cost and you can apply this type of fix to any type of cracked or broken plastic headphone band which is by using super glue along with baking soda.
The idea is that chemically combining both the superglue with baking soda will result in an instant cement that fixes the plastic broken pieces very powerfully so you gotta give this method a try at home.
Check the below instructional video on how to do that very easily and the fix will be done within seconds.
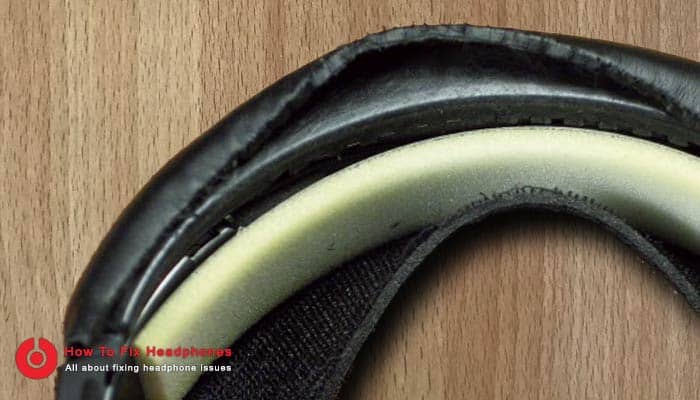
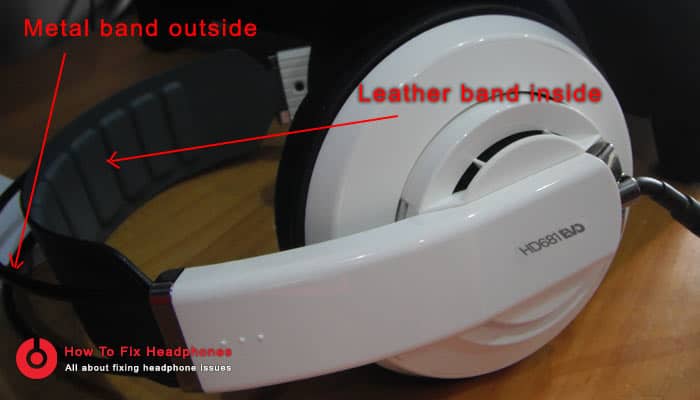
Headphone Band Fix 8: Replacing Damaged Leather Band
Some headphones use this design of having two layers of bands (metal + leather), the leather is fixed under the metal part and directly designed to sit over your head to carry the headphone weight (as shown in the below image).
If you have this leather damaged or expired after a long time of heavy-duty usage you can fix it very easily by using a normal leather belt that you have at home.
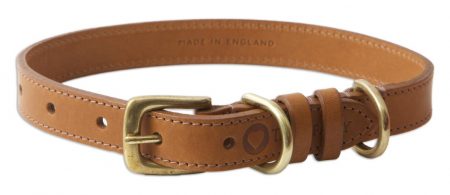
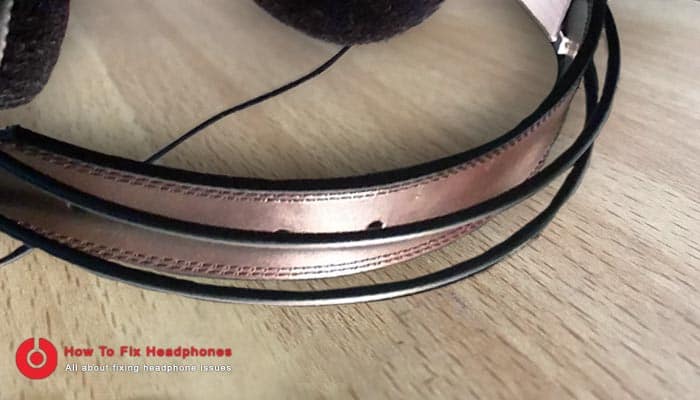
This fix requires measuring the exact length of the leather belt based on the original damaged one, also taking into consideration cutting the ends and making them thinner in order to fit into the speaker’s handles perfectly as shown in the below image.
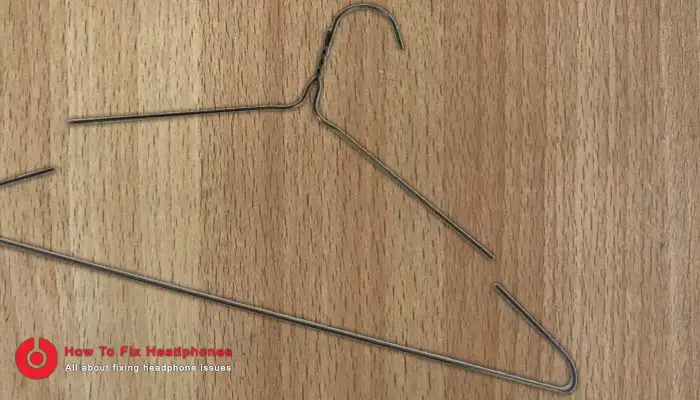
SLIM CLASSIC WALKMAN HEADPHONE STYLE – BAND FIXING
There is a very simple trick to fix this type of headphone band which is widely used even with other headphone sets that are mainly lightweight and made out of plastic or metal stripes as shown in the below image, and the tricky fix is by using a normal hairband.
The fix:
- Bring a hairband either metal or plastic (the one you prefer)
- Remove the broken band (leave the small plastic sleeves that are attached to both speakers).
- Attach each speaker’s sleeve to one end of the hairband and wrap them up tightly with fixing tape.
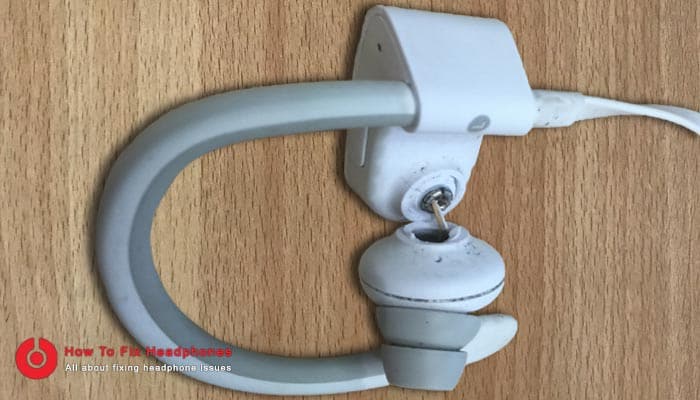
CLIP HEADPHONE STYLE – CLIP BAND FIXING
These types of headphones or headsets are rarely facing issues simply because their handles (clips) are made of an elastic-plastic which is easily bent with no issues and to be comfortable when we wear them, hence mostly they are covered with very soft silicone or rubber finishing.
I have a pair of these headsets which is very cheap made for many years now I never had them cracked or damaged, but with that being said, if you’ve ever faced issues with them like cracks or breaks the first thing to think of (as always) is to order new pieces to replace the broken ones if your clip headphones are cheaply made and don’t worth it, then try the below fix.
- Cracked Clips: If your clip headphone handle or clips is made of plastic and cracked, you can try using super glue and baking soda (as shown in Headphone Plastic Band Fix 7: Using Super Glue + Baking Soda) which is a perfect solution for such an issue cause normally the speakers are lightweight and a super glue fix is more than enough to handle it.
- Snapped Silicone or Rubber: If the silicon or the rubber of the clip is snapped or damaged you can simply fix that by wrapping a fixing tape over and over the place till the thickness of the wrap become close to the other side original silicon or rubber, and for the more nice look you can use a heat shrink tube to cover that wrap and heat it with lighter to fix it permanently.
- Cracked Plastic Body: This is also could happen to your clip headphone body (as shown in the image above) simply you can fix it using Super Glue and Baking Soda as mentioned in Fix no.7 above.
Why My Headphone Is Breaking?
Your headphone is breaking mostly because of your misuse, but if this is not the case then because of their lifetime, it all depends on the quality of your headphone whether it is cheaply made or branded they all have a lifespan, and one day they will be having issues as long as you are using it but if you have a quality branded headphone mostly it will take a long time to get issues in the worse case.
There are common issues a headphone band could have and most of them are easy to fix by yourself.
Types Of Headphone Band Common Issues:
- Broken (Cracked) Band
- Snapped Band
- Band Damaged Cushion
- Broken Band Arm
- Expired Cushion Leather (How to Fix Guide)
Headphone bands (headbands) get broken often because either their make quality is poor or because of misusing them but this is pretty normal, we are all facing our headphones get cracked or broken, however, most of those issues are simple to fix yourself as I did with mine last year.
Types Of Headphone Band Materials
There are several types of headphone bands (headbands) designed to serve the purpose of being comfortable to wear, and I am talking here about the on-ear (over-ear) headphones style that one of which could be your broken one.
So the headband types normally consist of a sort of foam covered by different materials such as:
- Polyester Fabric
- Nylon Mesh
- Squishy Silicone
- Leather-Wrapped Elastic: this comes with a silicon pad below its metal band.
- Synthetic Leather
- Leather
Related Questions
How Do I Get My Headphones To Work Again?
Check your headphone cord, its connector, or band for any damages, and if it is earbuds, check any debris gathered on each earbud’s meshes. You may also check your media device’s volume levels and jack connection as they might be the root cause.
Conclusion
Using headphones on daily basis could make our headphones to have issues, this is pretty normal regardless of what type or brand of headphone you have, whether it is cheap or branded but as a result, the best step to think if this happens is to Check your headphones warranties, if not valid then order the broken piece online and replace it, if not then try to fix the issue according to the above Broken Band Fixing guides even if you have different damage or cracked piece in different location simply you can take the above guide as a reference to use one of the methods and be creative.
Share this article below if you believe people need to know about it … 🙂
Recent Posts
Is Wireless Audio Transmission Not Reliable As Wired Headphones?
Yes, wired headphones are more reliable than wireless audio transmission, as wireless headphones' connection might drop from time to time, as well as it is much more dependent on batteries compared...
As a rule of thumb and the World Health Organization, each person should use headphones at less than 60 percent volume for 60 minutes a day. That’s the safest route you can take for the usage of...
